As AI-generated content continues to revolutionize the creative world, I'm excited to share my go-to method for mapping one face onto another image in Leonardo AI. This technique is surprisingly easy, produces excellent results almost every time, and has endless possibilities for artistic expression.
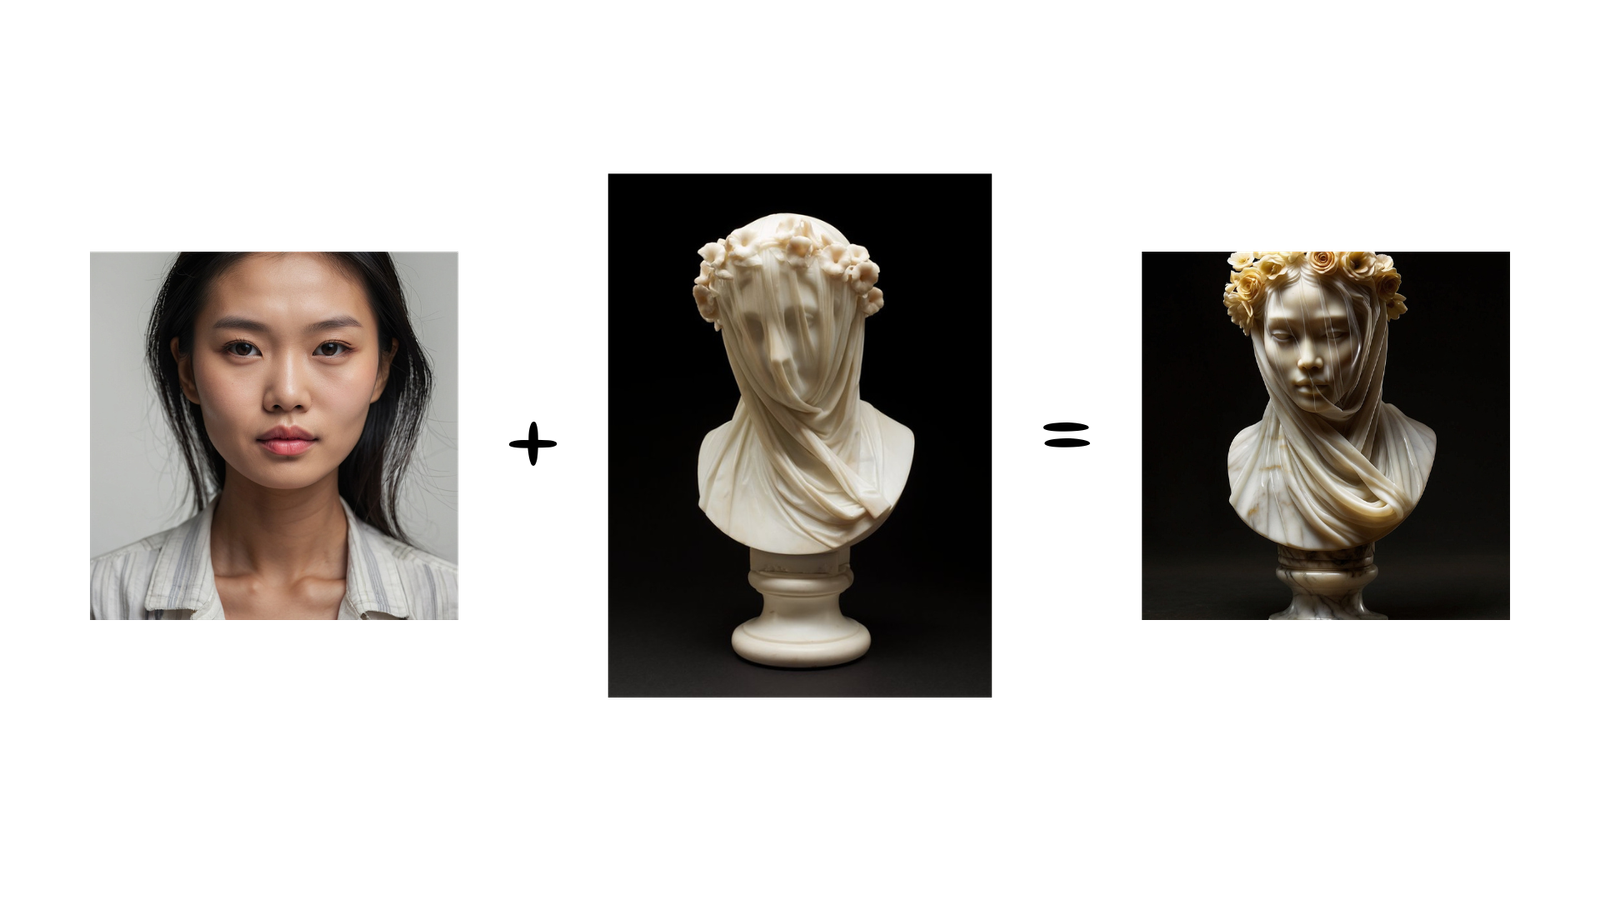
Our goal for this tutorial is to map the generated image of an Asian woman (created using AI) onto a real-world statue called "A Veiled Lady," which can be found in the Minneapolis Institute of Art.
If you're more of a visual learner or simply want to see how it's done, I recommend checking out my YouTube tutorial. It covers everything step-by-step.
Step 1: Write the Prompt with AI
To begin, we need to generate a prompt that accurately represents our desired image. In Leonardo, we can use the "Describe with AI" feature to create a detailed prompt from an image of our choice.
This feature uses multimodal large language models to analyze the image and provide a comprehensive description, taking into account colors, shapes, textures, and other visual elements.
To access this feature, click on the fairy dust button in the prompt window and select "Describe with AI." You can choose an image you've uploaded from your machine, something you generated earlier, or even an image from the community feed. Let's pick our statue image as a starting point for this tutorial.
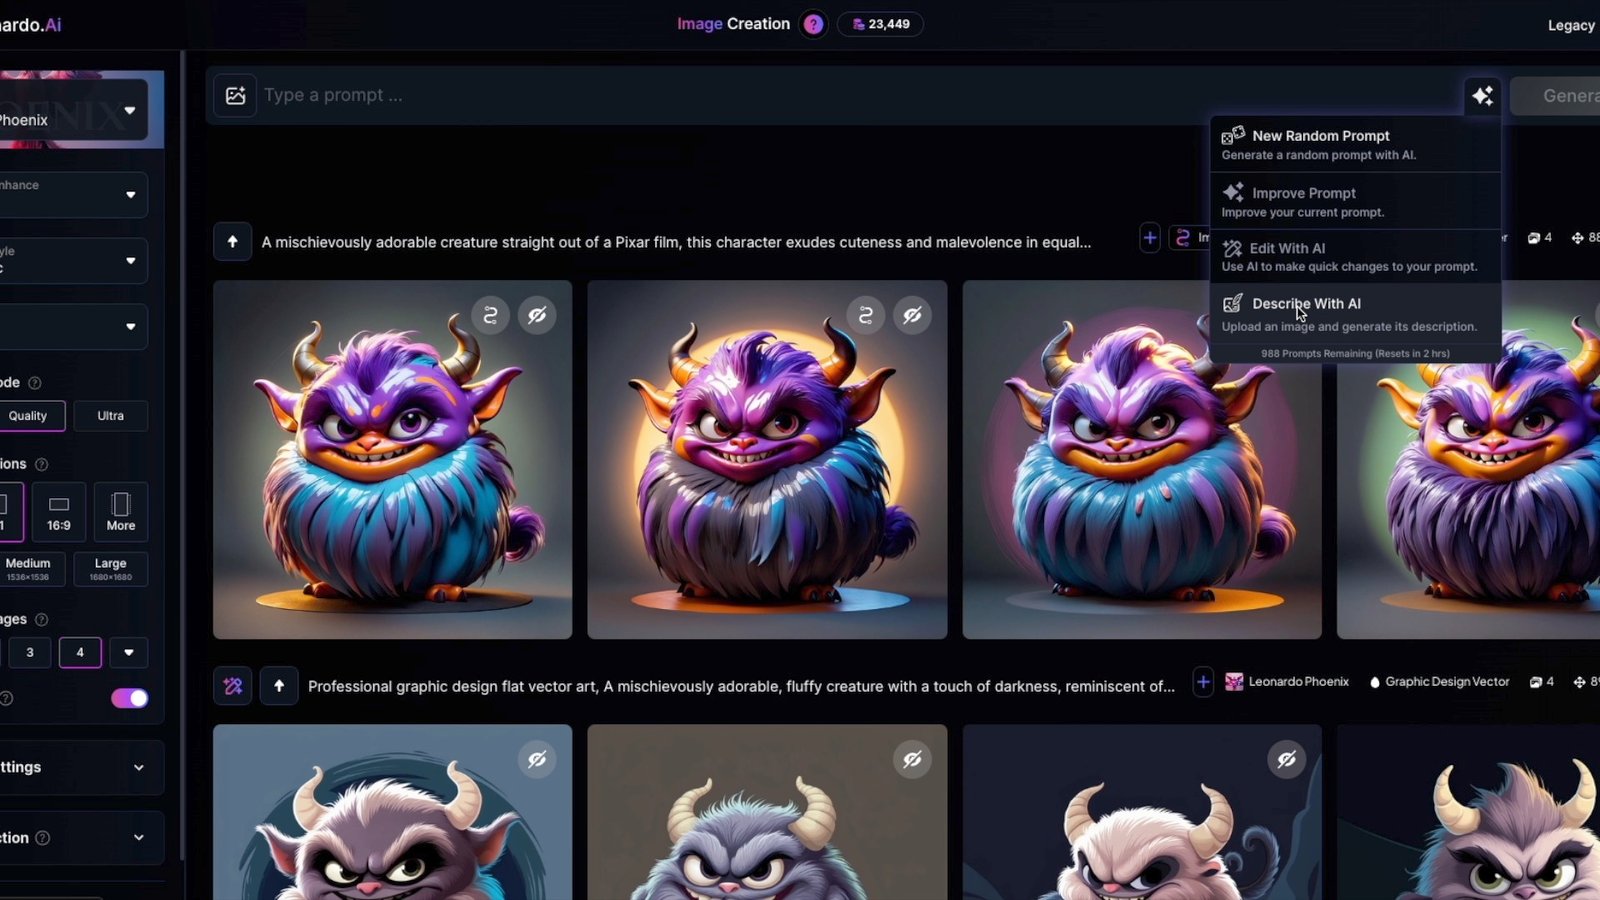
Leonardo will take a few seconds to analyze the image and come back with a super detailed prompt that I think does the image justice:
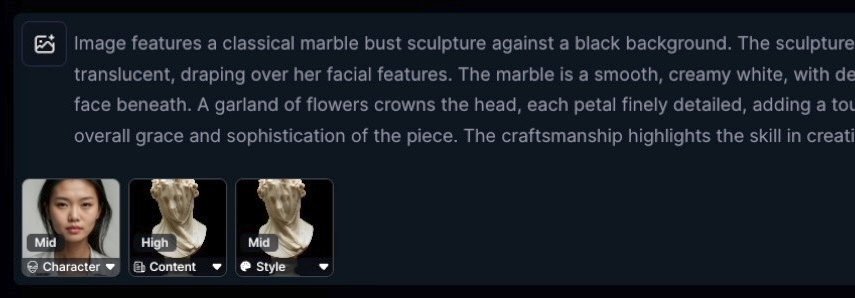
"Image features a classical marble bust sculpture against a black background. The sculpture depicts a veiled female figure, with the veil intricately carved to appear translucent, draping over her facial features. The marble is a smooth, creamy white, with delicate detailing that captures the folds of the veil and the subtle contours of the face beneath. A garland of flowers crowns the head, each petal finely detailed, adding a touch of elegance. The bust rests on a simple, rounded pedestal, enhancing the overall grace and sophistication of the piece. The craftsmanship highlights the skill in creating lifelike textures and expressions in stone."
Step 2: Choose the Right Model
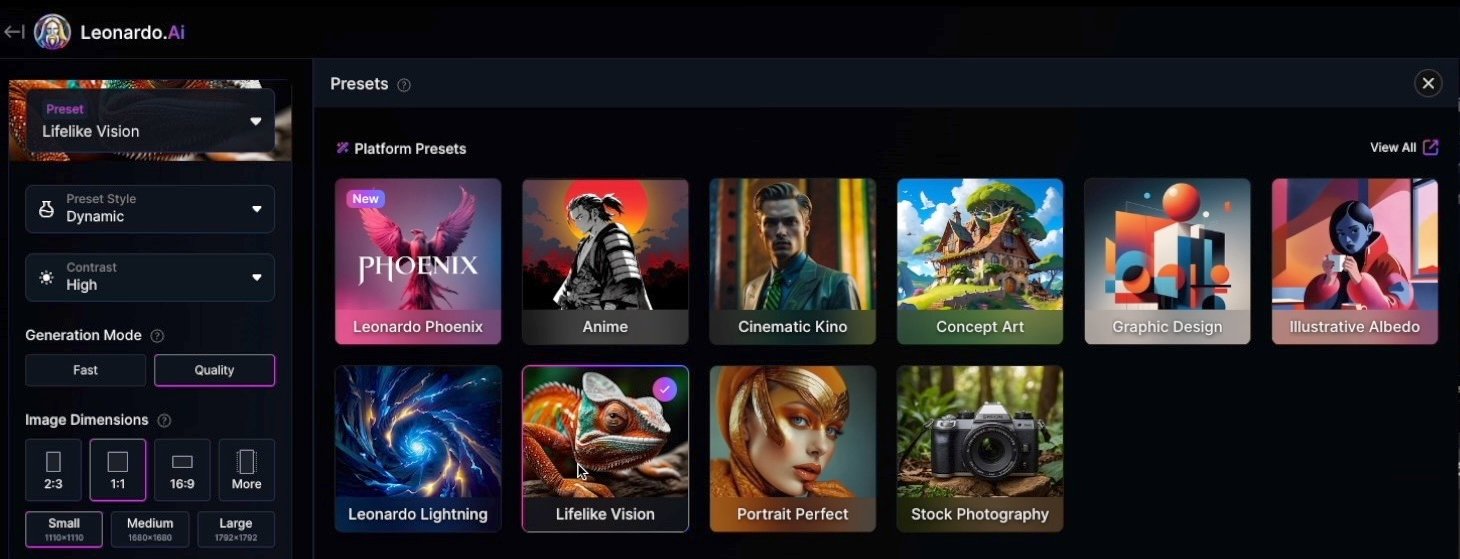
Once we have our prompt, it's time to select a suitable model for our image. Leonardo offers various presets that are essentially combinations of models and styles. The Phoenix model is quite powerful but doesn't fully support all image guidance features... yet! So, we must choose another model.
Since we want the result to be very realistic, let's choose the "Lifelike Vision" preset. This will give us the best chance of achieving photorealistic results while still allowing for some creative flexibility.
Step 3: Use Character Reference for Facial Reference
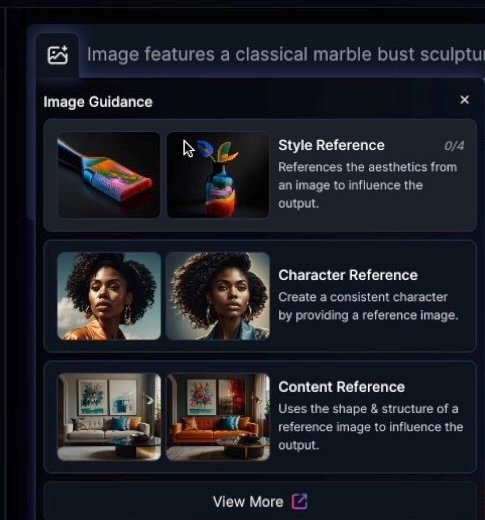
Next, let's click on the top-right button in the prompt window to open the image guidance options and select character reference. This feature allows us to use an image as a facial reference point for our desired output.
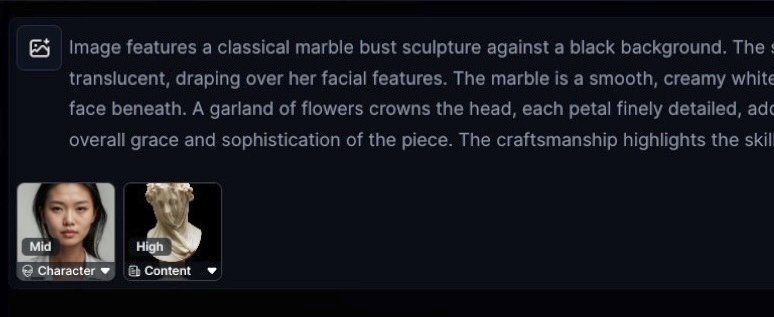
In this case, we want to map the face of the young Asian lady onto the statue. Let's choose her image as our facial reference point and apply character reference to achieve this transformation.
Step 4: Use Content Reference for Referencing the Image Shape
Now that we have our facial reference in place, let's use content reference to guide the shape and structure of our output. This feature uses the original image as a template to influence the final result, ensuring that the face is properly mapped onto the statue.
To access this feature, click on the top-right button again and select content reference. Then, choose the statue image as your shape reference point. This is what the image guidance settings look like at this point:
Step 5: Generate the Image
Before we generate the image, let's optimize our settings to achieve the best results possible. Under "advanced settings" on the bottom left, I recommend choosing the PhotoReal option. This will give us a highly detailed and realistic output that captures the essence of both images.
Now that we have everything set up, let's click "Generate".
The image generation takes a few seconds, but then it gives me exactly what I wanted: the face of the Asian lady rendered onto the statue.
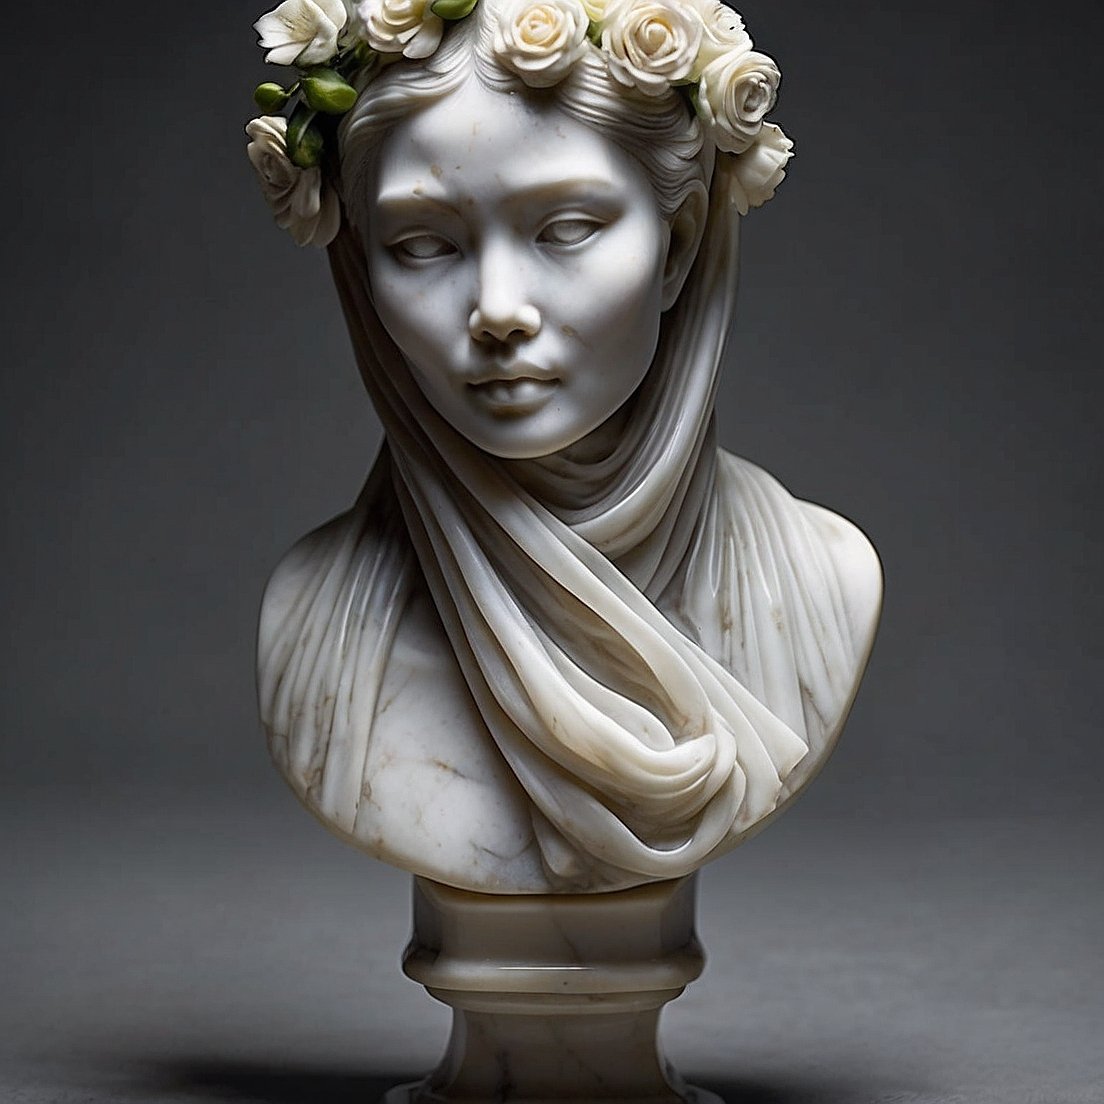
It's not perfect – the veil is missing – but it looks pretty good! There is a way to improve that using style reference.
Step 6: Refine with Style Reference (Optional)
To refine our image further, let's choose style reference with the statue image as our style guide:
Then, generate again to see the updated output.
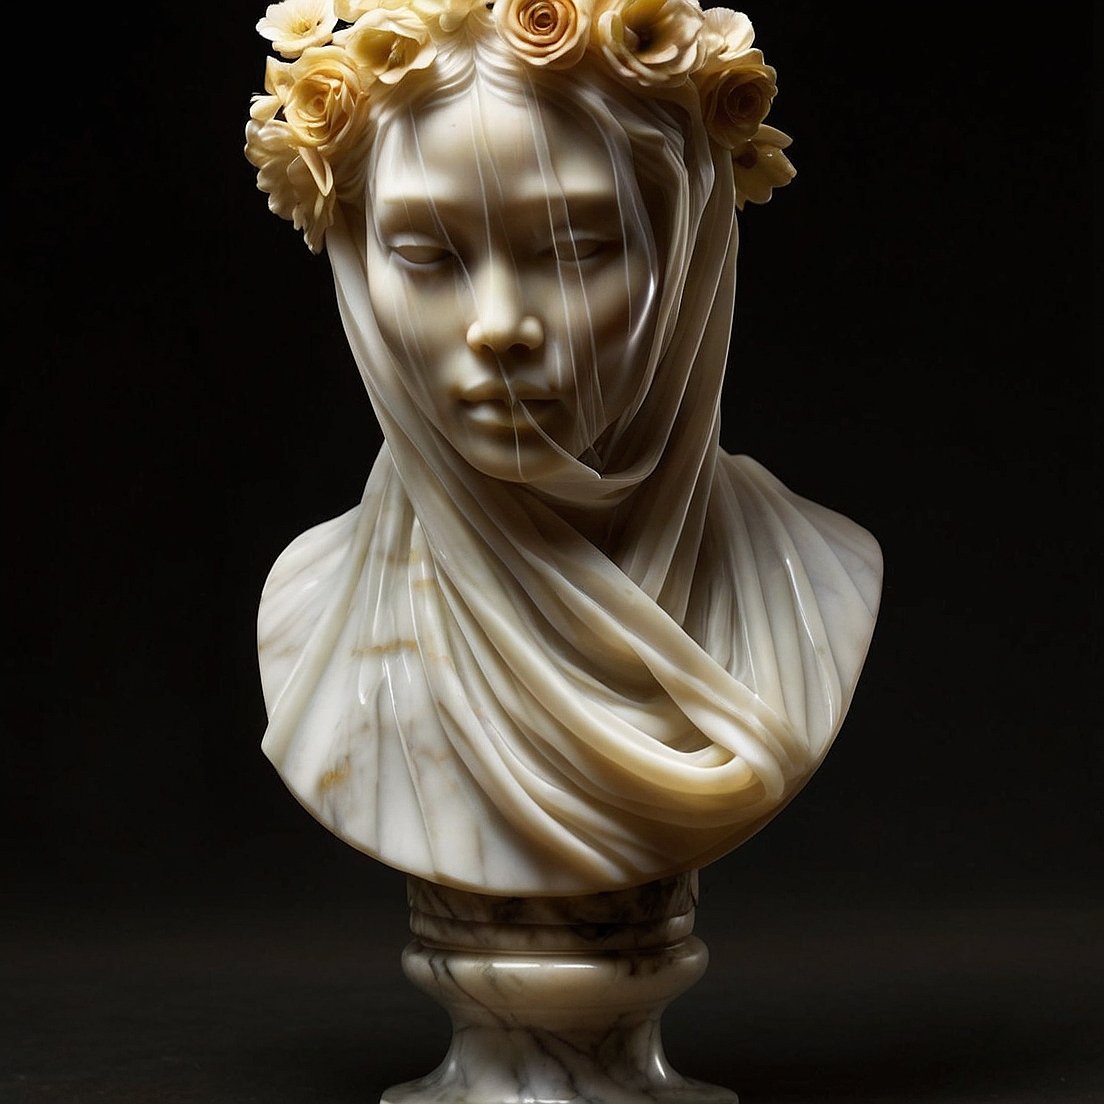
The final result is stunning! The face of the young Asian lady has been perfectly mapped onto the statue, capturing its essence while still maintaining her unique features.
Summary
By following these 6 steps, you can achieve impressive results in Leonardo by mapping one face onto another image. This technique has endless possibilities for artistic expression and can be used to create stunning images that inspire and captivate your audience.

