This is Part 2 of the ComfyUI Masterclass series, where we explore the powerful features of ComfyUI for AI image generation. Here's what we've covered so far:
- Part 1: Install and Run ComfyUI deals with installing ComfyUI on lightning.ai, a cloud platform that’s beneficial if you don’t have much GPU power. Since the installation steps are the same as for local installation, you can follow along regardless of your preferred setup
This article helps you navigate the maze of workflows and nodes in ComfyUI. In this guide, you'll learn:
- How to navigate the ComfyUI interface like a pro
- The essential components of any workflow
- How to build a complete workflow from scratch
- Smart techniques for organizing your nodes
If you're more of a visual learner or simply want to see how it's done, I recommend checking out my YouTube tutorial. It covers everything step-by-step.
ComfyUI Basics
When you first open ComfyUI, you'll see a default workflow on your screen. Think of it as a production line where each station has a specific job. This is a basic text-to-image setup.
Each box you see is called a node, and every node performs one specific task. Data flows through the colored lines connecting these nodes, with each connection point having a purpose, shown by its color and name. The nodes work together in sequence, like components in a machine.
Understanding the Interface
The new ComfyUI interface features a redesigned layout with a sidebar and top menu. The sidebar contains several key elements:
- Settings and theme controls at the bottom
- Workflows section
- Model library
- Node library with drag-and-drop functionality
- Queue history showing generated images
The top menu handles workflow management, allowing you to create new workflows, open existing ones, or export them as JSON files. The ComfyUI manager on the top right handles updates and model installation.
Building a Text-to-Image Workflow
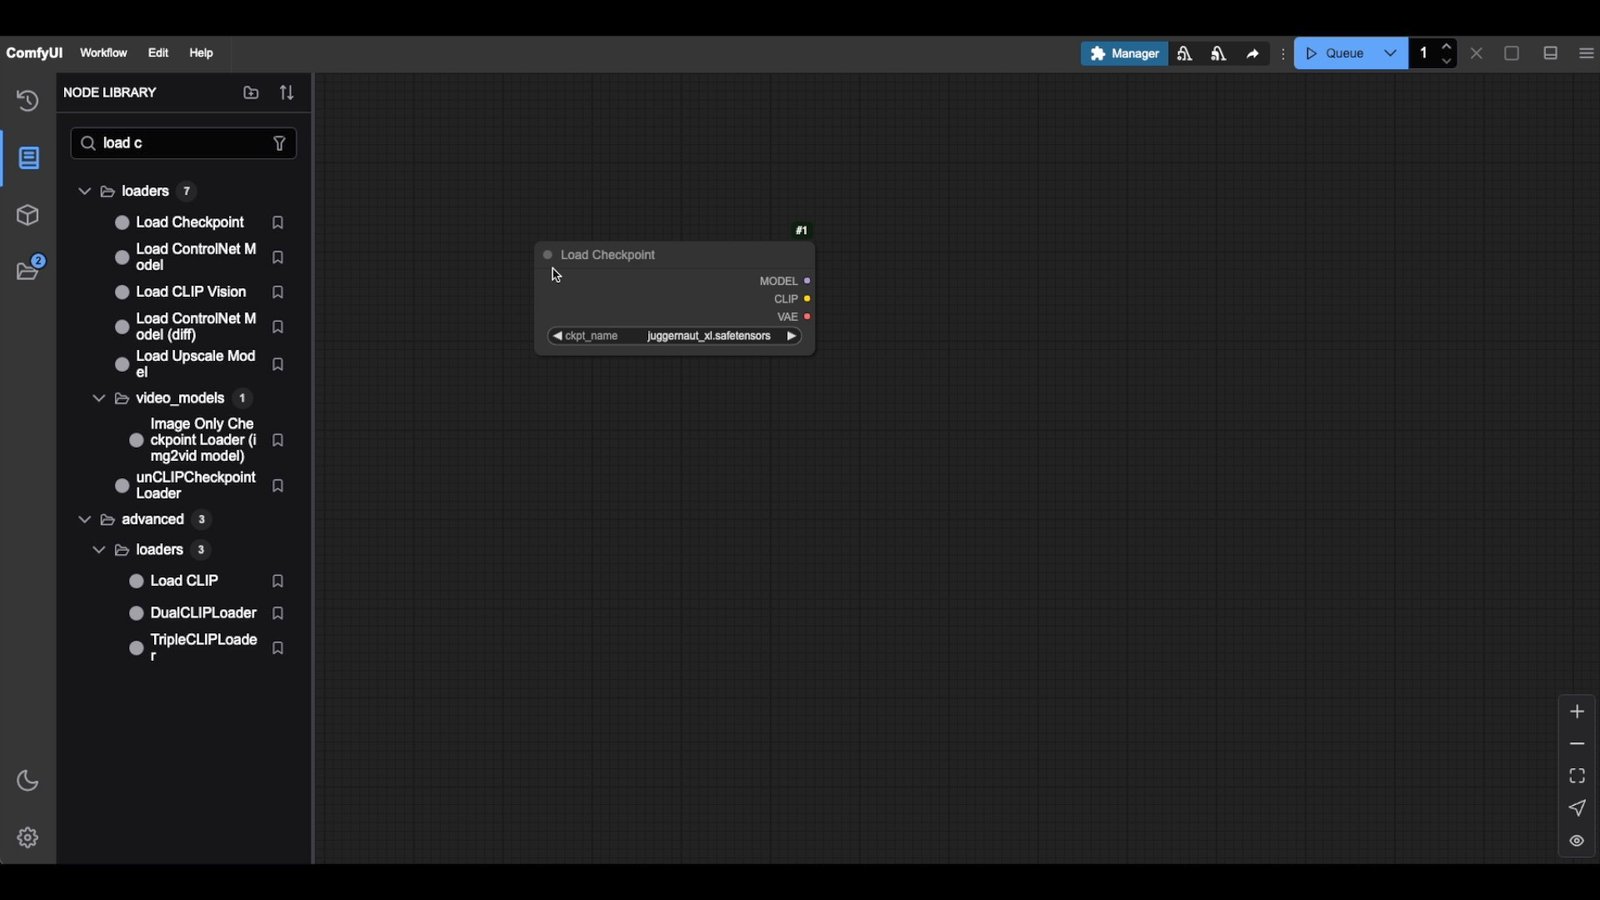
Start by creating a new workflow and adding a Load Checkpoint node. You can create nodes by:
- Dragging from the node library
- Double-clicking the canvas and searching
- Right-clicking and selecting from categories
Connect the nodes following the color-coding system. The matching colors tell us we can connect these nodes.
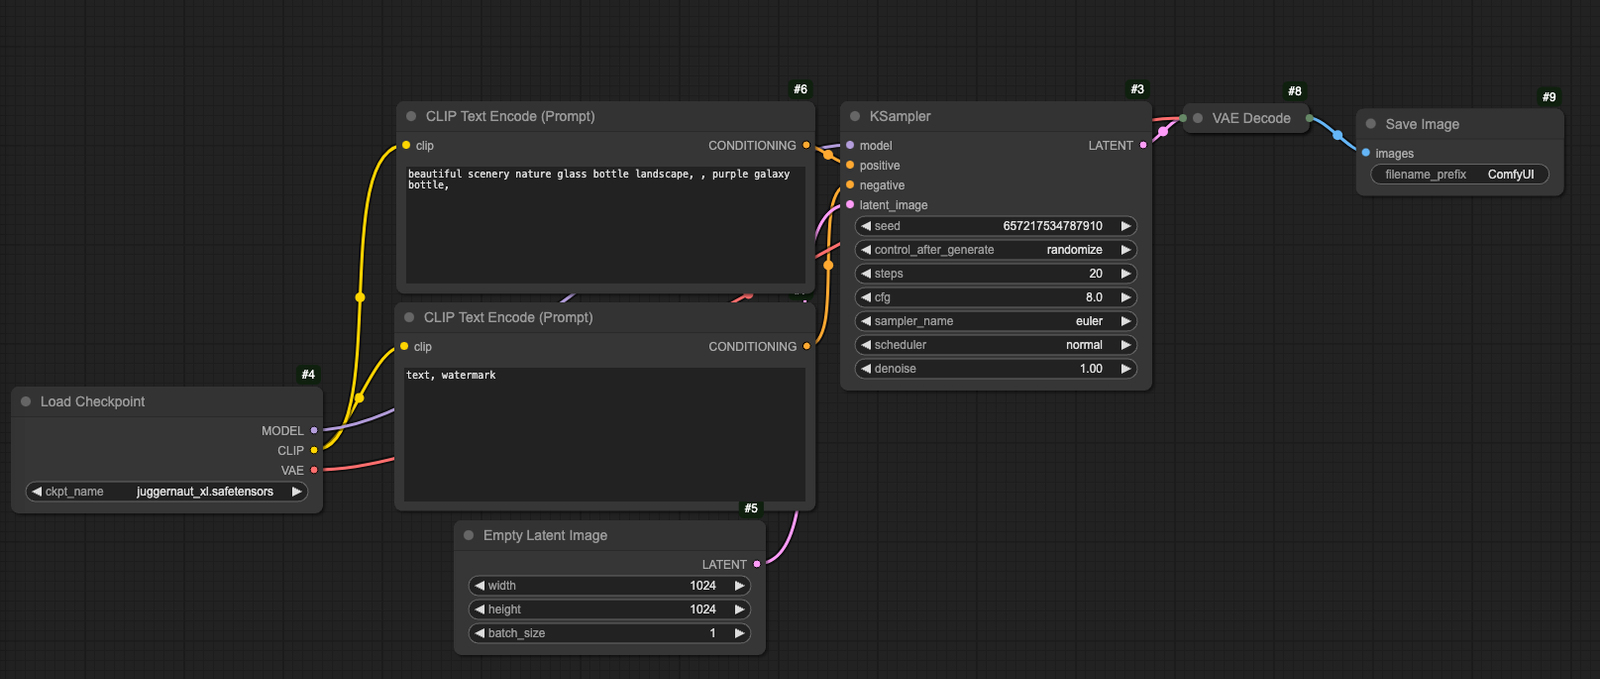
A complete text-to-image workflow requires several interconnected nodes working in sequence to transform your text prompt into an image.
Step 1 - Start with the "Load Checkpoint" node:
- Create it by double-clicking the canvas and searching, or dragging from the node library
- Select your preferred model (SDXL models or newer recommended)
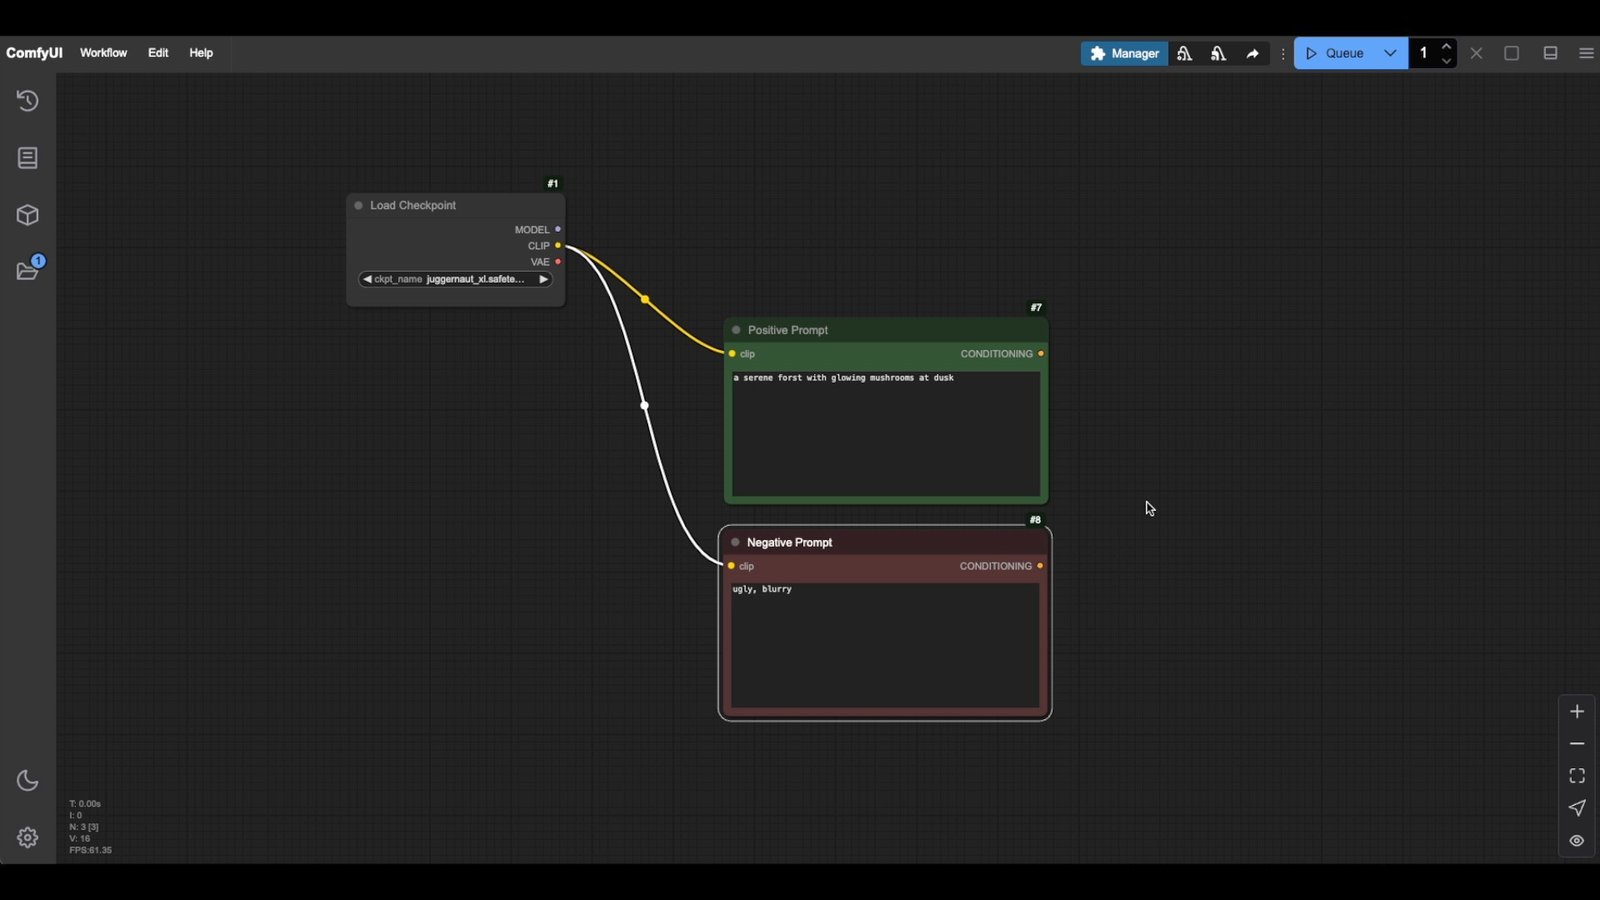
Step 2 - Add two "CLIP Text Encode" nodes:
- One for positive prompts (what you want to see in the generated image)
- One for negative prompts (what you want to avoid in the generated image)
- Connect the yellow CLIP output from Load Checkpoint to both nodes
CLIP stands for "Contrastive Language-Image Pre-Training." Think of it as a translator that converts your text prompt into something the image generator can understand. It helps the model create images that match your text by guiding it in the right direction.
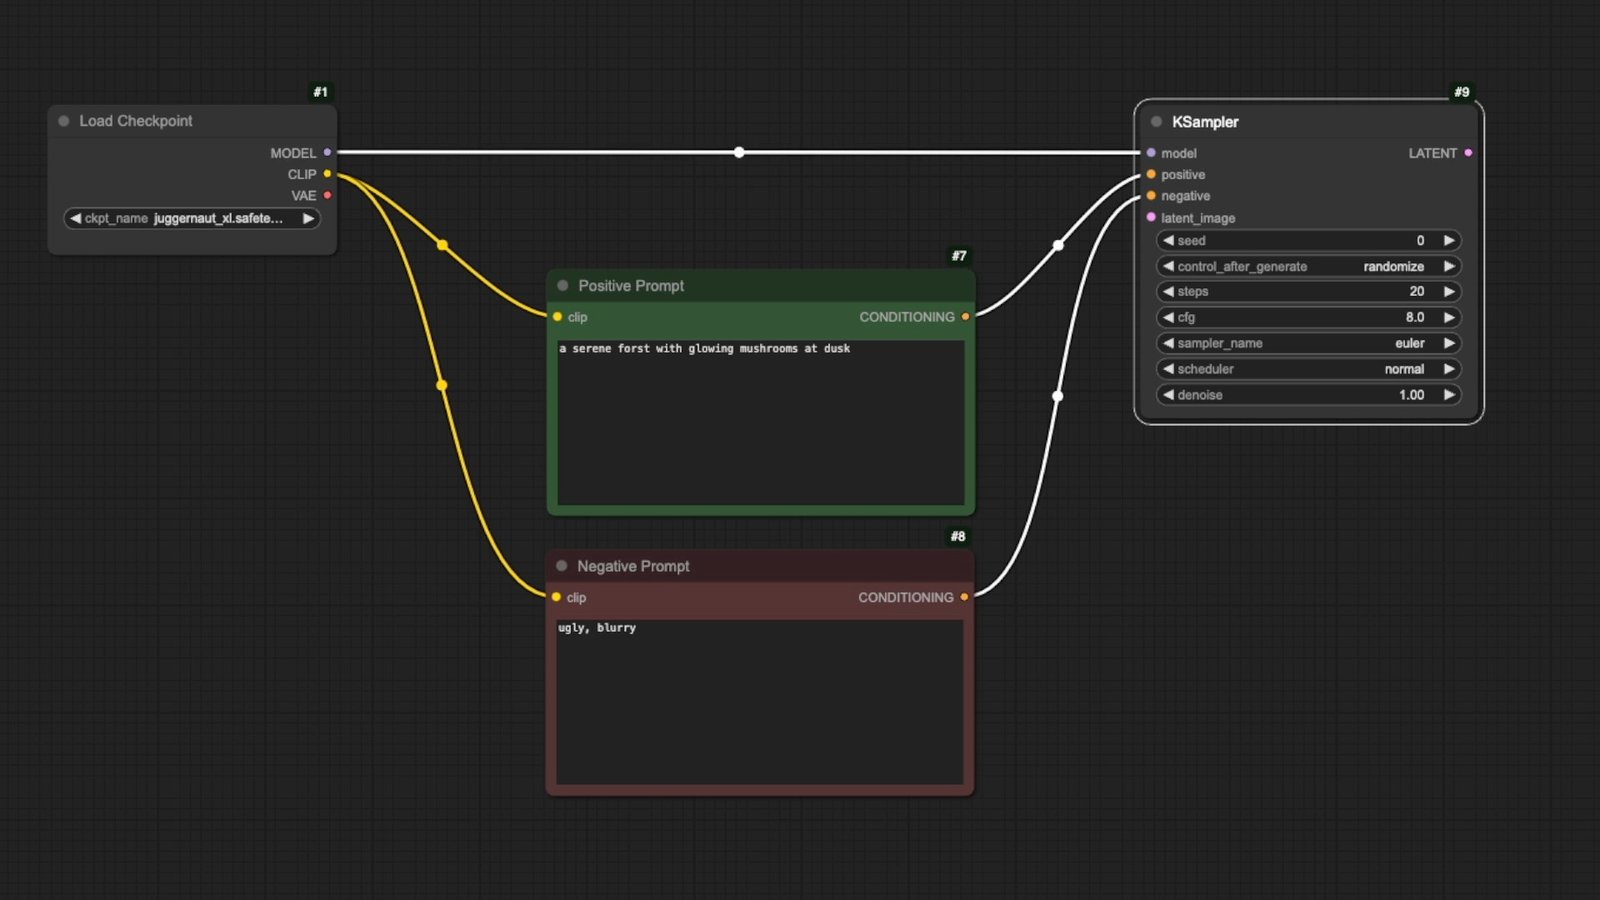
Step 3 - Add the "KSampler" node:
- Connect the orange "Conditioning" from positive prompt to "positive"
- Connect the orange "Conditioning" from negative prompt to "negative"
- Connect the lavender "MODEL" from checkpoint to "model"
The sampler is what transforms random visual noise into a coherent image based on our prompts and settings. Think of it like this: image generators start with a random "noisy" image, and the sampler gradually refines it, guided by our prompts and parameters.
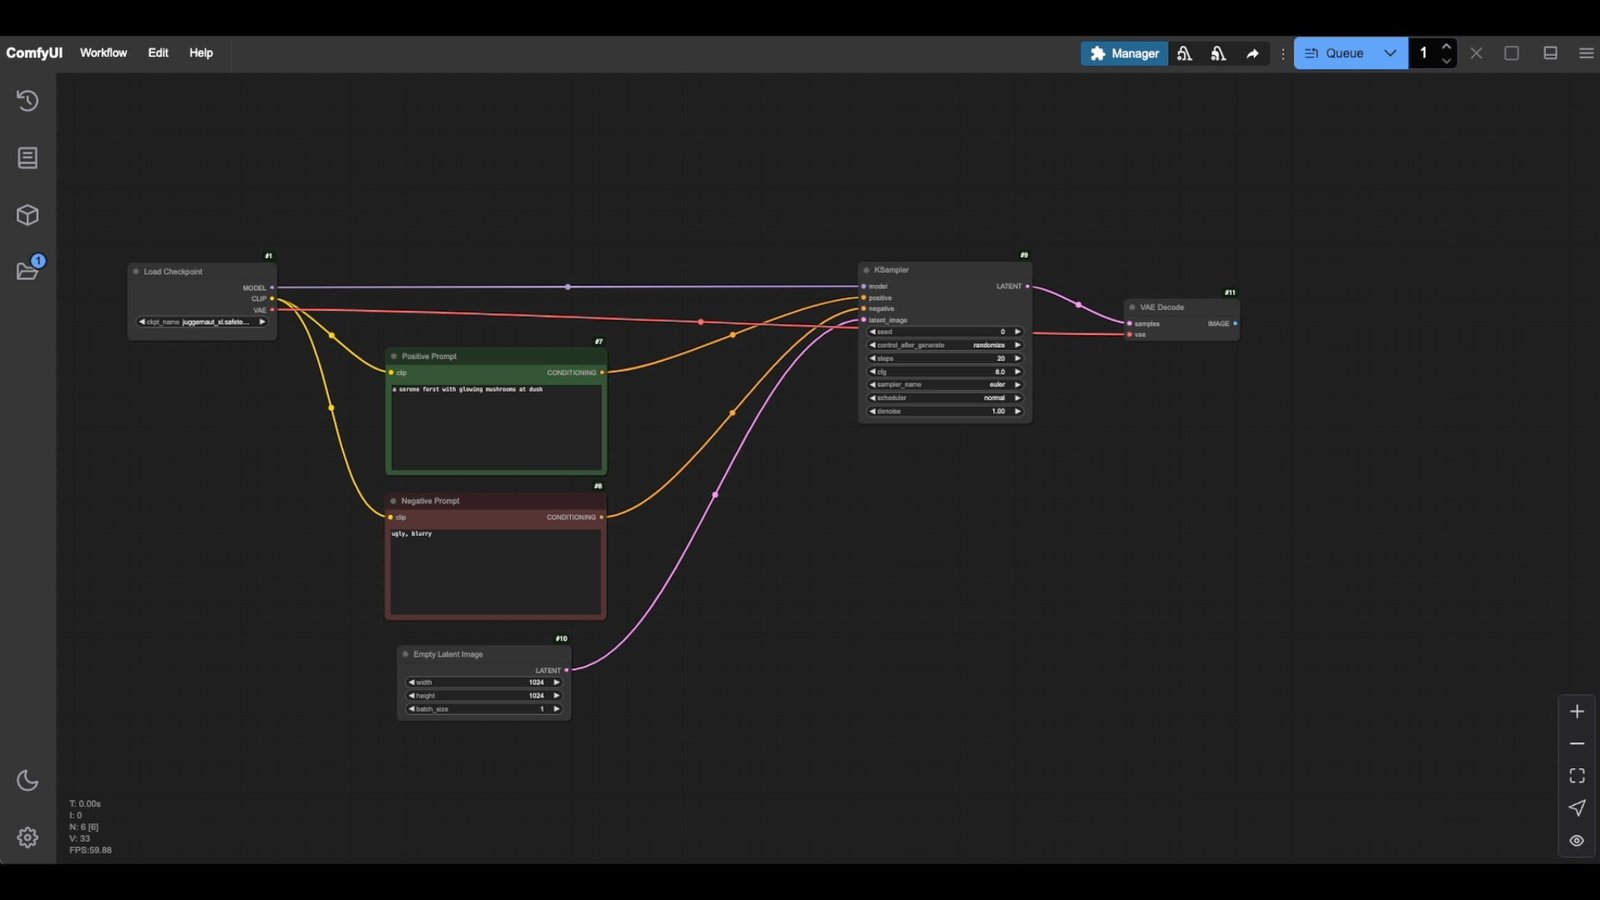
Step 4 - Create an "Empty Latent Image" node:
- Set dimensions to 1024x1024 for SDXL models
- This generates the initial noise pattern
- Connect the pink output from Empty Latent Image to pink input in the KSampler node
![]()
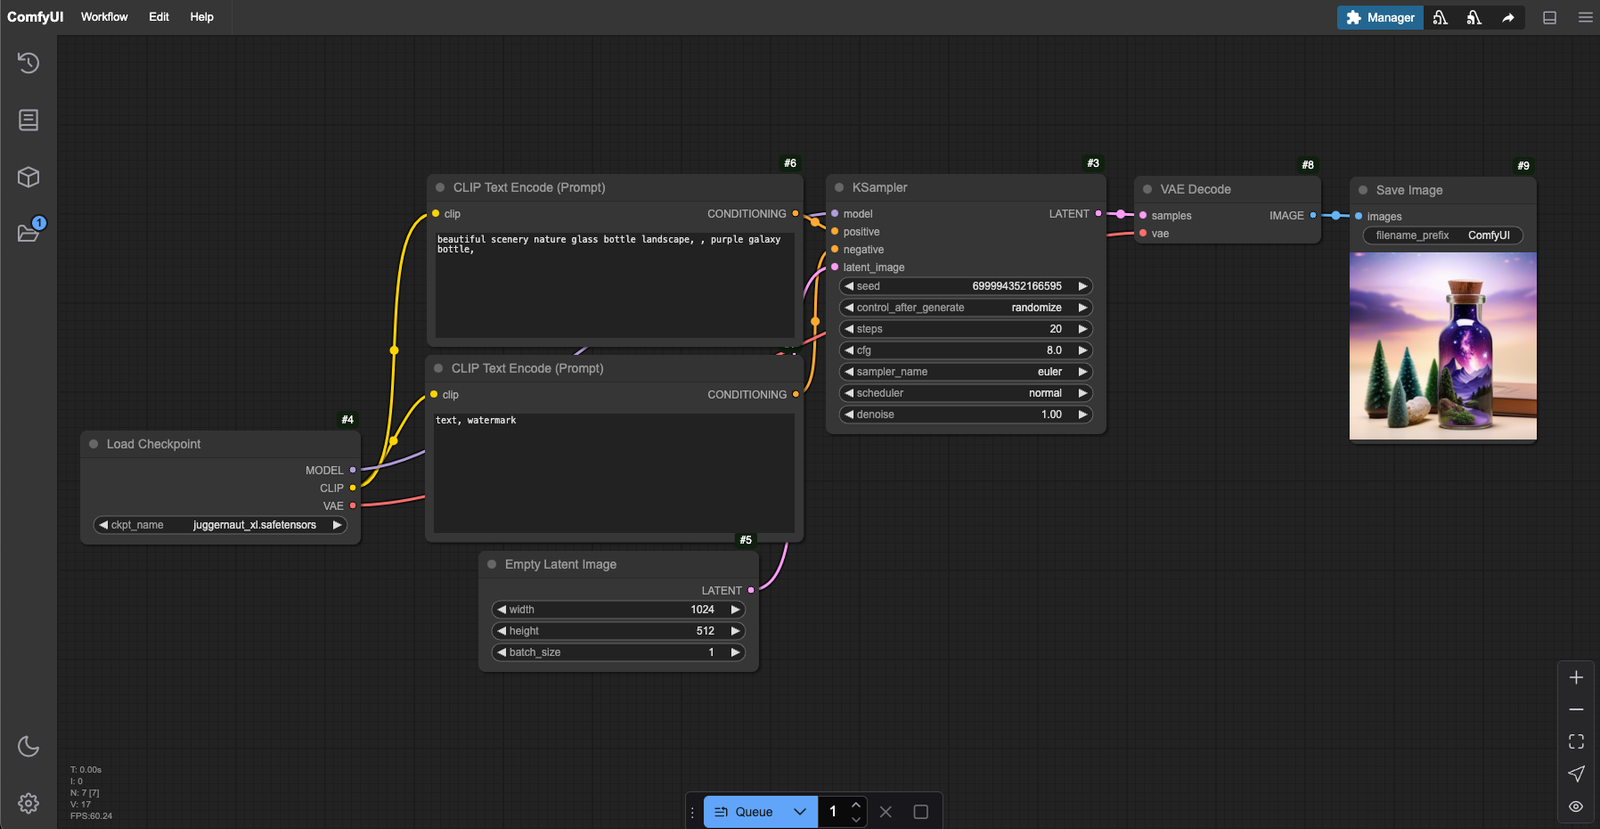
Step 5 - Add the VAE Decode node:
The sampler's output is still in that special AI format, so we need to decode it into something we can see. Add a "VAE Decode" node - this transforms the latent space into regular pixels.
- Connect the pink "LATENT" from KSampler
- Connect the lavender "VAE" from Load Checkpoint if your model has "VAE" baked into to it. Otherwise, you will need to load a special VAE checkpoint file and feed that into your VAE decode node.
Step 6 - Finally, add the Save Image node:
- Connect to the VAE Decode output
- This automatically saves generated images in the output folder of where comfyui is installed

After connecting all nodes, click the Queue button to generate your first image. Nodes will light up green sequentially as they process, culminating in your final generated image.
Workflow Organization Tips
Keep your workflows organized using these techniques:
- Color-code nodes for visual organization
- Collapse unused nodes using the top-left circle
- Use the reroute node for cable management
- Group related nodes together
Remember that when working with SDXL-based checkpoints, optimal results come from using 1024x1024 pixel dimensions. The workflow processes images through a latent space before converting them to standard pixel format.
Download the Workflow
You can download the workflow shown in this tutorial here.
ComfyUI Masterclass Part 3
In part 3 of the ComfyUI Masterclass series, we explore the K Sampler node settings that control your image generation.