This is Part 3 of the ComfyUI Masterclass series, where we explore the powerful features of ComfyUI for AI image generation. Here's what we've covered so far:
- Part 1: Install and Run ComfyUI deals with installing ComfyUI on lightning.ai, a cloud platform that’s beneficial if you don’t have much GPU power. Since the installation steps are the same as for local installation, you can follow along regardless of your preferred setup
- Part 2: Nodes and Workflows covers the ComfyUI interface, essential node types, and how to build a complete text-to-image workflow from scratch, including workflow organization techniques
This article explores the settings that control your image generation.
If you're more of a visual learner or simply want to see how it's done, I recommend checking out my YouTube tutorial. It covers everything step-by-step.
Understanding Image Generation
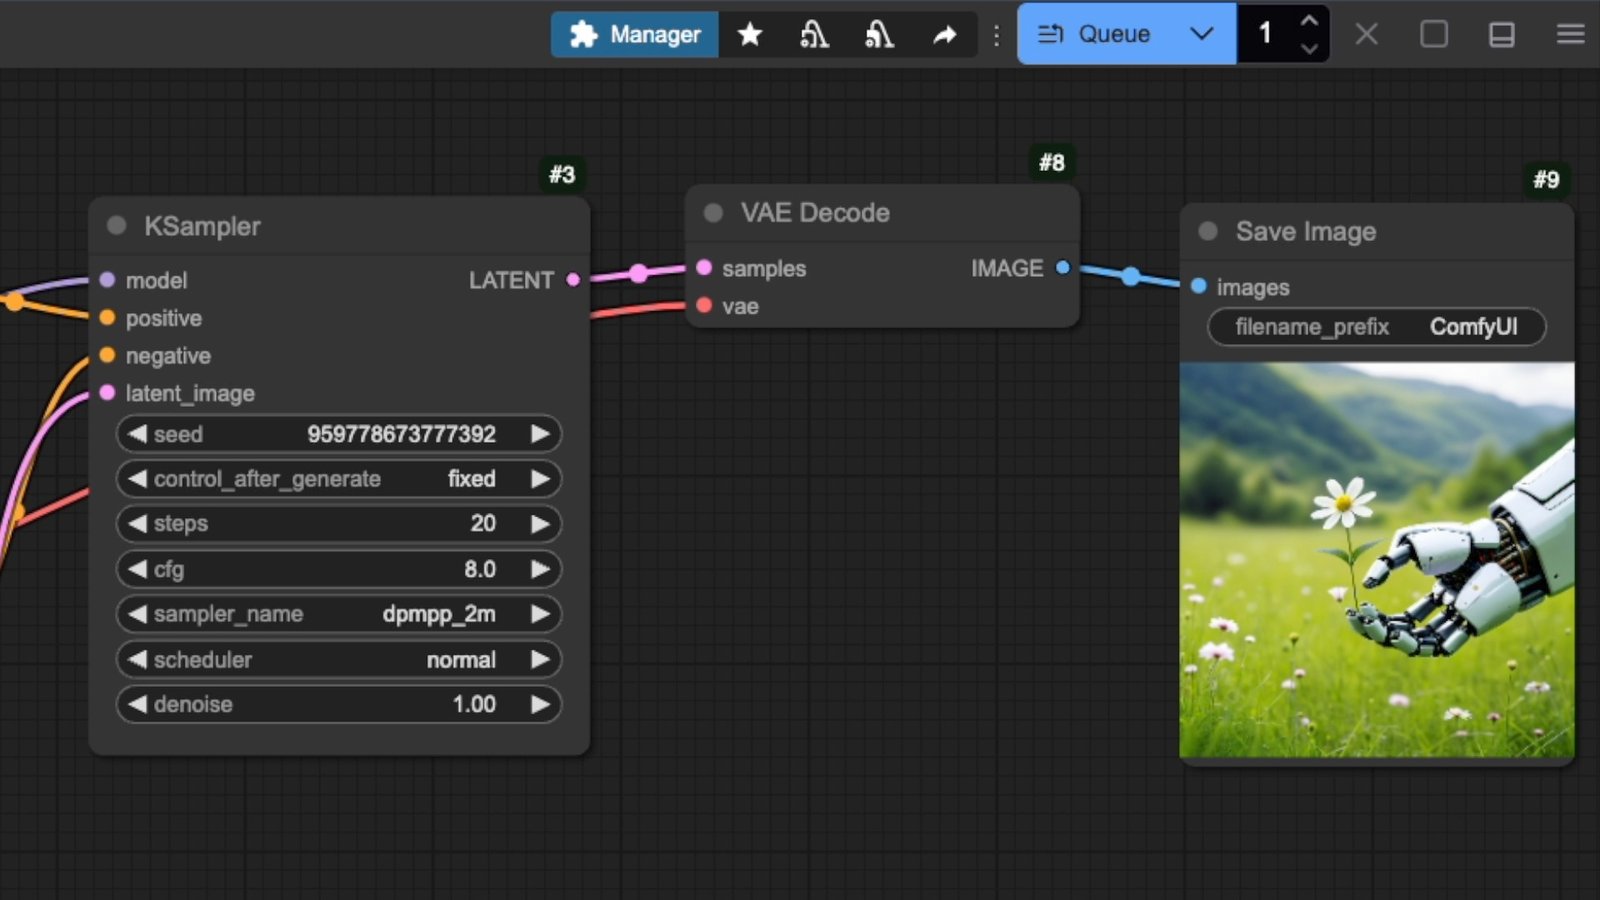
The KSampler is where the magic of image generation happens. To understand its operation, let's start with the Empty Latent Image node.
This node creates a blank canvas in a special format that AI models can understand. It's not connected to the prompt or model - it simply generates an empty container. When decoded with a VAE decoder and preview node, this empty latent appears as a plain grey image.
The KSampler takes this empty latent image and fills it with random noise based on a seed value. Then, step by step, like a sculptor chiseling away at a block of stone to reveal a statue, it removes this noise in a precise way. At each step, it analyzes the current noisy state and uses the prompt as a guide to determine which noise to remove and what details to keep.

KSampler Settings
Seed
A seed is just a number, but it plays a crucial role in image generation. When the KSampler receives the empty latent image, it uses this seed number to create a specific pattern of noise. Using the same seed with identical settings produces the exact same image every time.
However, changing the size of the empty latent image while keeping the same seed produces different results, as different image sizes need different amounts of noise. The same applies when changing models or prompts - they all interpret this initial noise pattern differently.
The "Control after generate" option in the KSampler node offers four choices:
- "Fixed" maintains the same seed number
- "Randomize" generates a new seed after each generation
- "Increment" adds one to the seed number
- "Decrement" subtracts one
Steps
The steps setting controls how many times the KSampler processes the image, removing noise bit by bit until reaching the final result. Like a sculptor working on marble, early steps make broad cuts to reveal basic shapes, while later steps carefully carve out intricate details.
Lower step counts (around 20) generate images quickly, while higher counts produce more refined results but take longer. Different samplers work best with different step counts - some create great images with just 20 steps, while others might need 50 or more.
For everyday use, 30-40 steps provides a sweet spot between quality and generation speed. The biggest changes happen in those first 20-30 steps, with later steps mainly refining details that might be too subtle to justify the extra generation time.
CFG (Classifier Free Guidance)
The CFG setting in the KSampler node controls how closely the AI follows the prompt during noise removal. At each step of the process, the AI creates two versions: one following the prompt and another freely interpreting the noise. Think of it like having two sculptors - one following a detailed blueprint, and one working purely from intuition. The CFG number determines how to blend these two approaches.
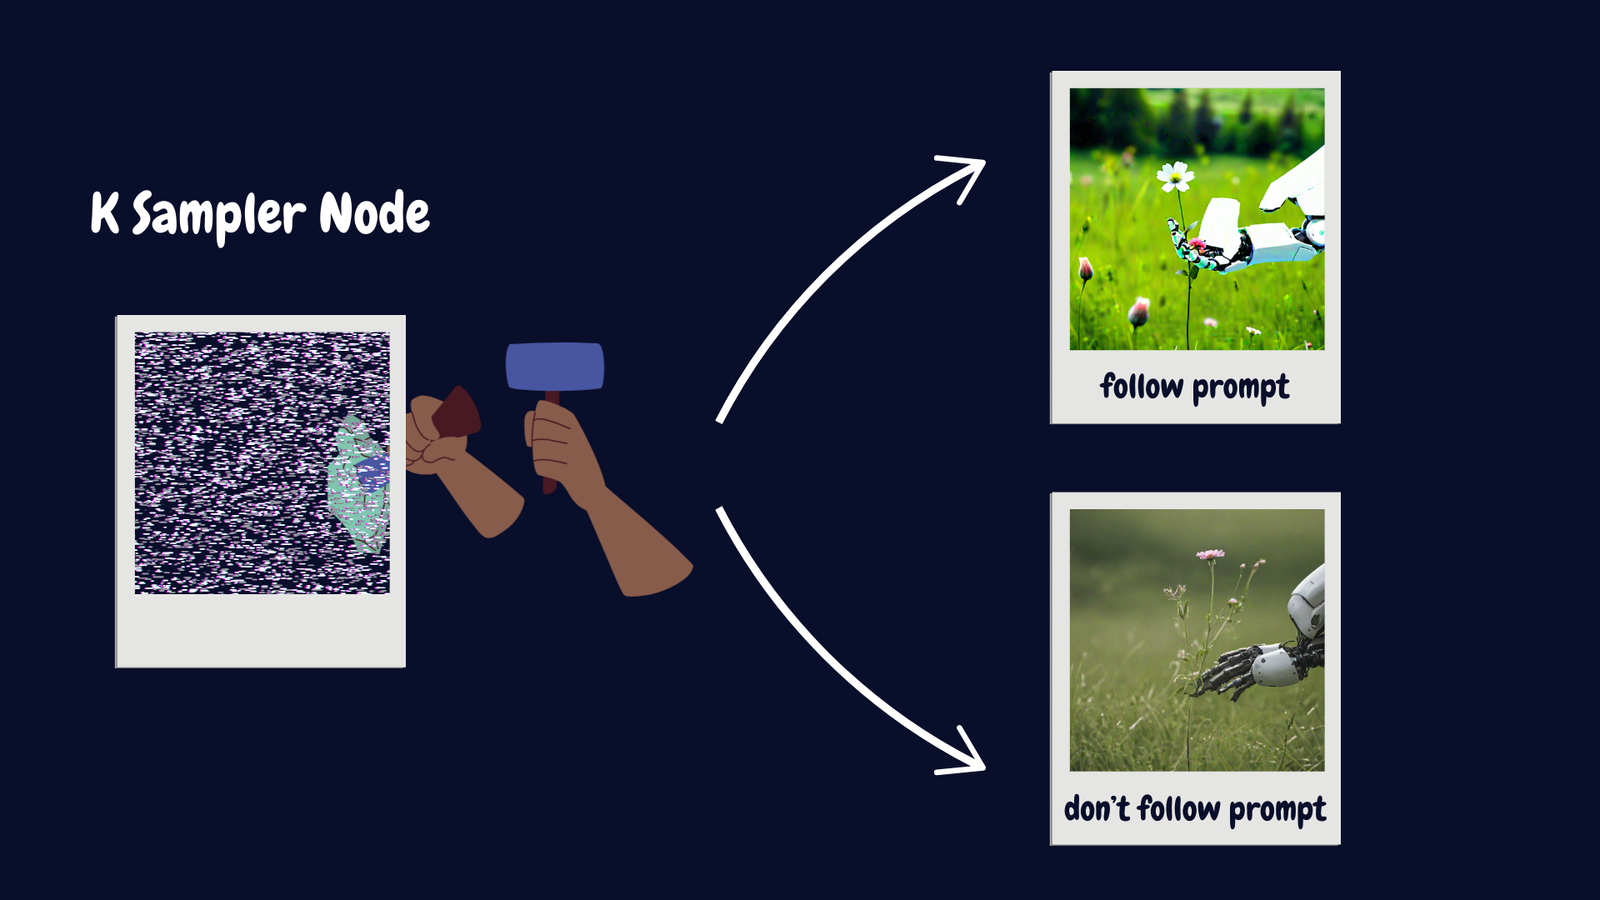
Lower CFG values (around 3-4) give the AI more artistic freedom, potentially creating great images that might not match the prompt exactly. Higher values (around 20) make the AI follow the prompt very strictly, sometimes resulting in unnatural-looking images. For most generations, values between 7 and 9 provide the optimal balance between prompt adherence and artistic interpretation.
Different models might prefer different CFG values - some work best with lower numbers, while others need higher values for optimal results.
Sampler Name
The sampler setting determines which technique the KSampler uses to remove noise. Different samplers are like different chiseling techniques, each with its own approach to revealing the final image.
The largest group is the DPM family, using Diffusion Probabilistic Models. These samplers are identified by names starting with "dpm" or "dpmpp", where "pp" indicates an improved version of the original method. Examples include dpm_2, dpmpp_2m, and dpmpp_2s_ancestral.
Classical mathematical solvers like euler and heun use traditional mathematical methods for noise removal. Additionally, unique samplers like ddim and uni_pc offer specialized approaches designed for efficiency, potentially producing quality outputs much faster than traditional methods.
Samplers marked with "_gpu" are optimized versions that run faster on graphics cards, ideal for generating multiple images quickly. For beginners, euler or dpmpp_2m are recommended starting points, using 20-30 steps and a CFG value between 7 and 8.
Scheduler
The scheduler controls the timing and intensity of noise removal during the generation process. Think of it as a timeline manager that determines how aggressively noise is removed at each step.
The 'normal' scheduler provides a balanced, all-purpose approach suitable for most situations. The 'karras' scheduler becomes more efficient after the first 8 steps, removing noise more precisely. Each scheduler affects the final image differently, particularly in areas like background details and fine features.
There's no universally "best" scheduler - the optimal choice depends on specific needs and how it interacts with other settings like steps and sampler choice.
Denoise
The denoise setting acts as a strength control, ranging from 0 to 1, determining how much the AI processes the image. For text-to-image generation, this value should remain at 1, as the process starts with an empty latent image filled with pure noise that needs complete processing.
Lower denoise values become relevant in image-to-image workflows, where preserving parts of an original image might be desirable. In a text-to-image context, using values below 1 would result in incomplete noise removal, affecting the final image quality.
Conclusion
Understanding these KSampler settings is crucial for achieving optimal results in ComfyUI. Each setting plays a vital role in the image generation process, and mastering their interactions allows for precise control over the final output.
Download the Workflow
You can download the workflow shown in this tutorial here.
ComfyUI Masterclass Part 4
In part 4 of the ComfyUI Masterclass series, we explore everything you need to know about batch processing in ComfyUI, from basic concepts to advanced workflow optimization techniques.